


By Engineered Software Inc.
System troubleshooting can be a difficult process for even the most experienced professionals and securing the necessary data to support your conclusions can be even more challenging. Before you can get started, you will need to know how your system was designed, how it is supposed to operate, and where on the curve your pumps are operating at, among other factors. In this article, we will walk you through a system that is operating correctly, two problem scenarios that we encountered with this system, and throughout this article we will also explain some common pitfalls and tips on how to avoid them.
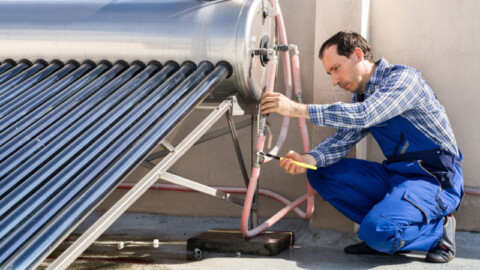
When it comes to gathering data on a system, building services are among the hardest. This is because most of the piping system may be hidden behind equipment or built into the physical structure, such as the walls and ceiling, and instrumentation is often few and far between. For example, one of our engineers recently visited a mechanical room where over half of the pressure gauges on the pumps were either broken or outside of their rated range.
In a situation such as this, it is important to never speculate on how well they were calibrated, and when comparing these systems, you may have to get a little creative.
Don’t get discouraged, and you should not attempt to take exact measurements in this instance but can still receive general data. For instance, if the pressure gauge only goes to 80 psi, but the needle is slightly past the 80, do not attempt to calculate the pressure because you have passed the instruments range, and any readings will be unreliable. What you will know however, is that there is a fault somewhere in the system that is causing it to operate outside of its design parameters.
As all components of a piping system are interconnected, a problem with one component will impact the hydraulic performance of the entire system. Because of this, we must be able to understand the symptoms the system is showing, and then focus in on the root cause of the problem. Before we can do this however, we need to know what is “NORMAL”? If the system has been operational for some time, then the systems operator should have a decent understanding of what normal is for their system.
However, it is always helpful, whether you have worked with the pumping system before or are new to it, to build a flow model to give you a better understanding of what is going on and what “normal” should be. For this example, we’ll say that the pressure, flow, level and valve position readings in Figure 1 are the normal steady state operating conditions for this particular system.

Figure 1: System under normal operation
Normal operation:
- The supply tank is open to atmosphere and its level maintained at 10ft
- The supply pump has a suction pressure of 15 psig and a discharge pressure of 80.5 psig
- The heat exchanger has an inlet pressure of 67 psig and an outlet pressure of 57 psig, for a total differential pressure of 10 psid at 1000 gpm
- The flow control valve is 85 per cent open with 1000 gpm flowing through it
- The product tank is pressurised to 25 psig and has a level of 15ft
After being placed into operation, the system began to experience a variety of issues. One operational note is that the flow rate from the product tank is reduced to maintain the tank level, which limits the flow rate for the entire system. While this is an issue, it is not the main system problem.
Take a minute, and compare Figure 1 with Figure 2, and see if you can identify what is causing the system issue in Figure 2.

Figure 2: System with initial issue
A good first step is to look at how everything compares to the normal system operation. Here is a quick summary of how the operation differs.
- Supply tank level: OK
- Pump suction pressure: OK
- Pump discharge pressure: Higher than normal
- Pump dP: Higher than normal
- HX inlet pressure: Higher than normal
- HX outlet pressure: Lower than normal
- HX dP: Higher than normal
- FCV: Open farther than normal
- System flow rate: Less than normal
- Product tank level and pressure: OK
What’s abnormal and what could cause it?
It would be understandable to look at the pump first, as the discharge pressure is higher and the differential pressure is higher, which indicates that the pump is producing more head, but this is expected because the pump is running farther back on the pump curve at the lower flow rate. The heat exchanger inlet pressure is also slightly higher, but this is due to the higher pump discharge pressure.
The total pressure drop across the heat exchanger is 18 psi at 940 gpm, when under normal operating conditions it should be 10 psi an even higher flow rate. This would indicate that the heat exchanger has been plugged up, and thanks to this flow model we have solved the mystery of this systems main problem.
Now to move on to a new system. The system is Figure 3 was built with a system expansion in mind, but they ran into issues during implementation. A trial run was done to determine the maximum flow rate possible, and even with the flow control valve at 100 per cent open, the maximum flow rate was limited to just over 1000 gpm.
Compare the system in Figure 3 with the system in Figure 1 and see if you can determine the root cause of this system’s problem.

Figure 3: System with expansion issue
Look again at how all our devices compare to normal:
- Supply tank level: OK
- Pump suction pressure: OK
- Pump discharge pressure: Lower than normal
- Pump dP: Lower than normal
- HX inlet pressure: Lower than normal
- HX outlet pressure: Lower than normal
- HX dP: OK
- FCV: Open farther than normal
- System flow rate: Normal
- Product tank level and pressure: OK
Were you able to determine what is abnormal and what could be causing it? The flow control valve is open farther to maintain the same flow rate, and this could be due to the lower inlet pressure. The system pressures downstream of the pump are lower than normal, and so is the differential pressure across the pump. This indicates that it is producing less head for the same flow rate of 1000 gpm, so that it is operating below its pump curve. This shows that there is a pump problem, which could be caused by a damaged impeller, worn wear rings or a clearance issue.
In any system there are as many potential problems as there are components, and as you increase the number of branches, loops and/or multiple malfunctions, it can become increasingly more challenging to discover the root cause of your problem. Having a good model or digital twin of your own system can be an invaluable tool to let you make changes and see how the system interacts with itself. Regardless of the complexity of your system, we hope these two examples have given you some insights into the troubleshooting process and given you a few new tools for your troubleshooting tool box.


